
Tempering Chocolate Using the Seeding Method – A Beginner’s Guide

For the sake of this post, I am purely talking about tempering milk chocolate, and for the most part, this is still the case for white chocolate also, using this seeding method.
Tempering chocolate is a daunting task for many home bakers and chefs, though it is a great skill to have to create smooth, glossy, and delicious chocolate confections.
The process of tempering is key to achieving the desired texture and appearance of any chocolate-based desserts or treats. In this post, we’ll provide an introduction to tempering. This is a simple method to temper chocolate like a professional and you don’t need to use a thermometer.
At the end of this post, you’ll simply be able to temper chocolate and use this to add chocolate to your home-baked creations and take them to the next level.
So what is tempering chocolate?
Tempering chocolate is a process that involves heating and cooling melted chocolate. This technique is used to give the chocolate a desirable glossy sheen, a firm snap when broken, and a pleasant and smooth texture.
The process involves melting the chocolate to a certain temperature, then cooling it to a lower temperature, followed by reheating it to the ideal temperature for working with the chocolate. When done correctly, tempering chocolate can give you high-quality, professional results. Does this sound fiddly? Well, it can be and you would need a thermometer to help. I want you to be able to temper chocolate easily just by using your microwave.
I am a home baker, do I need to be tempering chocolate?
As a home baker, tempering chocolate is a great way to achieve a professional finish.
Tempering chocolate helps give it a glossy sheen and snap, as well as a smooth and silky texture.
Furthermore, it prevents the chocolate from melting too quickly and becoming sticky, giving it a longer shelf life.
In addition, it results in a shiny and attractive appearance, making it more appealing to the eye.
Finally and for the appearance this I feel is the best reason to temper your chocolate, it does not bloom, which is the formation of white streaks on the surface of the chocolate. (I wonder if you have experienced this issue when trying to temper chocolate?).
Overall, tempering chocolate provides numerous benefits and is a great technique for any home baker.
Do I need to use a thermometer to temper chocolate?
You can use a thermometer, however, as you will find out below I don’t use a thermometer when I am tempering chocolate with the seeding method. You can use a thermometer but that method is slightly more complicated as you need to raise the chocolate to a certain temperature, then lower it and increase it slightly. In all honesty, I think for home and hobby bakers this method achieves the same results without the complexity of needing and using a thermometer.

What is the best chocolate to use to temper chocolate?
To temper chocolate, it is recommended to use high-quality couverture chocolate, which is specifically designed for tempering and has a high percentage of cocoa butter. This type of chocolate has a consistent texture and melting point, making it ideal for tempering and creating smooth and glossy chocolate creations.
I buy my chocolate in bulk from Henley Bridge and you can grab a £5 discount by using this link.
Not convinced?
Well, let’s get on with the steps to see if this is something you might try….. It is one more step than what you would do to melt chocolate anyway, trust me. Let’s go
Step 1
Weigh out your chocolate, for this example, I will use 200g. This will depend on what you want the chocolate for and how much you use it. I would suggest over-estimating as the chocolate can be re-tempered using this method.
Step 2
Break up your chocolate into smaller pieces ready to temper. You don’t need to do this if you have bought chocolate buttons.
Step 3
You will need roughly 10%- 15%, (so in this case25g ish) of the original amount of chocolate popped aside in a separate bowl. Set this aside for later on.
Step 4
Melt your chocolate in 30-second bursts in the microwave. So with this, you are gradually melting the chocolate and the aim of the 30-second bursts is so that it doesn’t burn. If you have ever burnt chocolate then you will understand and you won’t believe how easy it is to do this. I have done this a number of times in my earlier days of using chocolate.
Step 4
After 30 seconds take the bowl out of the microwave and stir. You will find not much has changed to the chocolate at this point but we must do this at a gradual pace. Pop the bowl back into the microwave for another 30 seconds. Again stir.

Step 5
Repeat this process until your chocolate is fully melted (and this means fully!) upon removing it from the microwave. Even if there is a tiny bit of chocolate left in the bowl when stirring then pop it in the microwave for maybe 10-20 seconds.
Step 6
Wow! How did we hit 6 steps? It’s because I am waffling and filling in with extra tips but I want you to get this correct. (See at it again!)
Anyway, now add your set-aside chocolate into the melted chocolate and stir until this is melted too.
Step 7
The chocolate should now be fully melted and will appear a lot thicker. Guess what? You are ready to use the chocolate and do whatever you like with it.
I make a lot of cakesicles and use this method all the time. Wasn’t this easy?
Step 8
Do whatever you want with the chocolate but you will need to work quickly as this sets much quicker than if you were to just melt the chocolate in the microwave.
Do I need to use a thermometer?
Here are a few ideas
You could dip strawberries or other fruit into it.
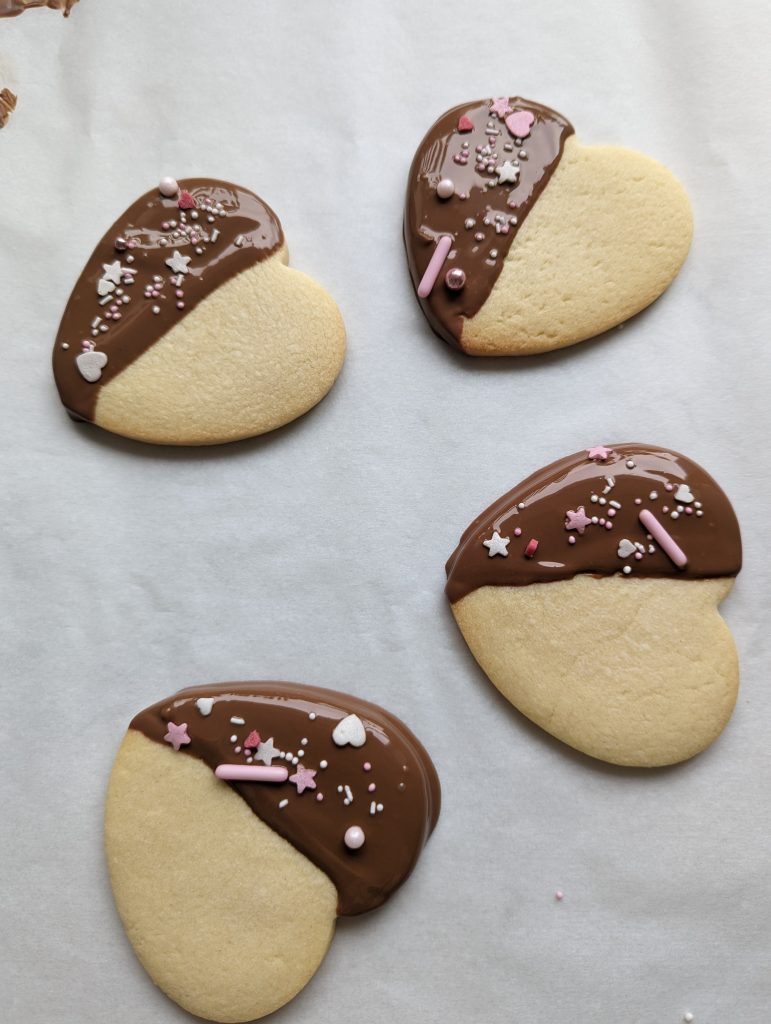
Make dipped cookies, see here for the full tutorial
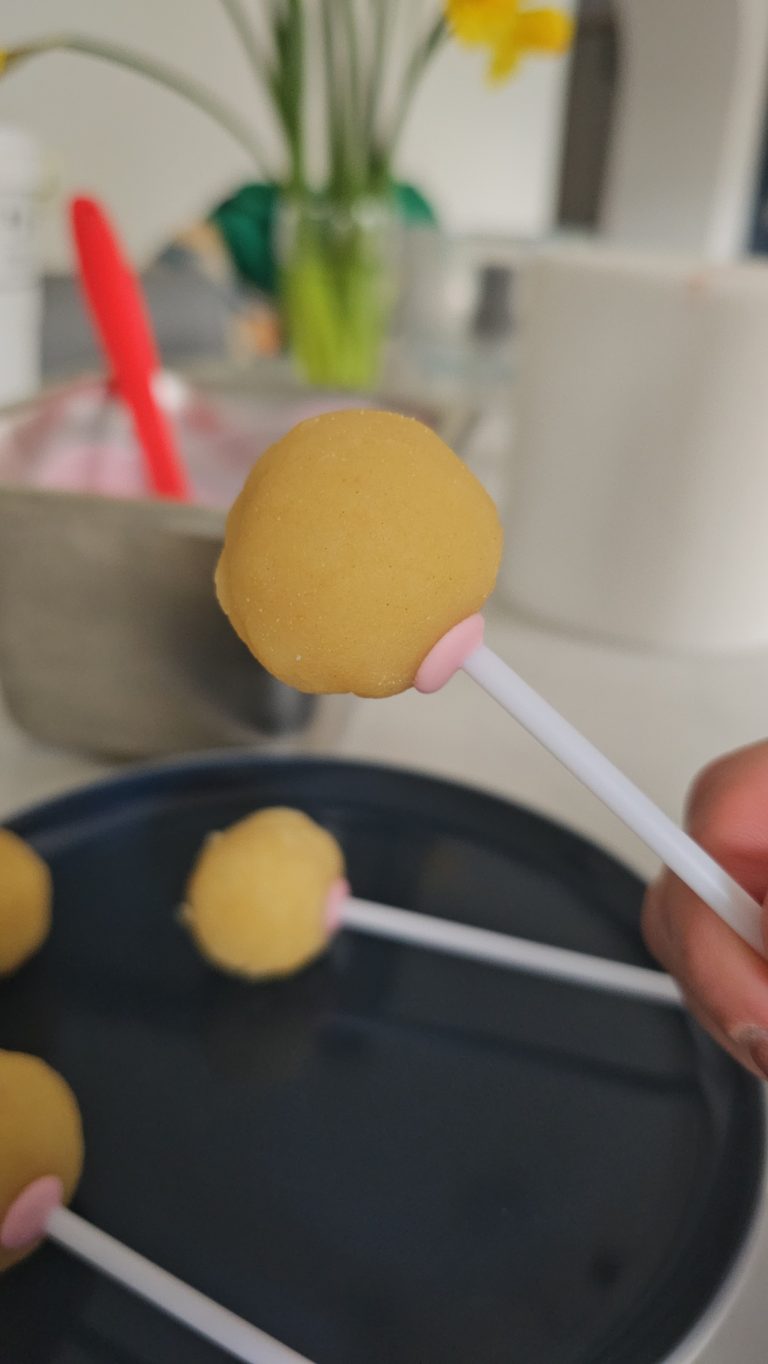
Make cakesicles
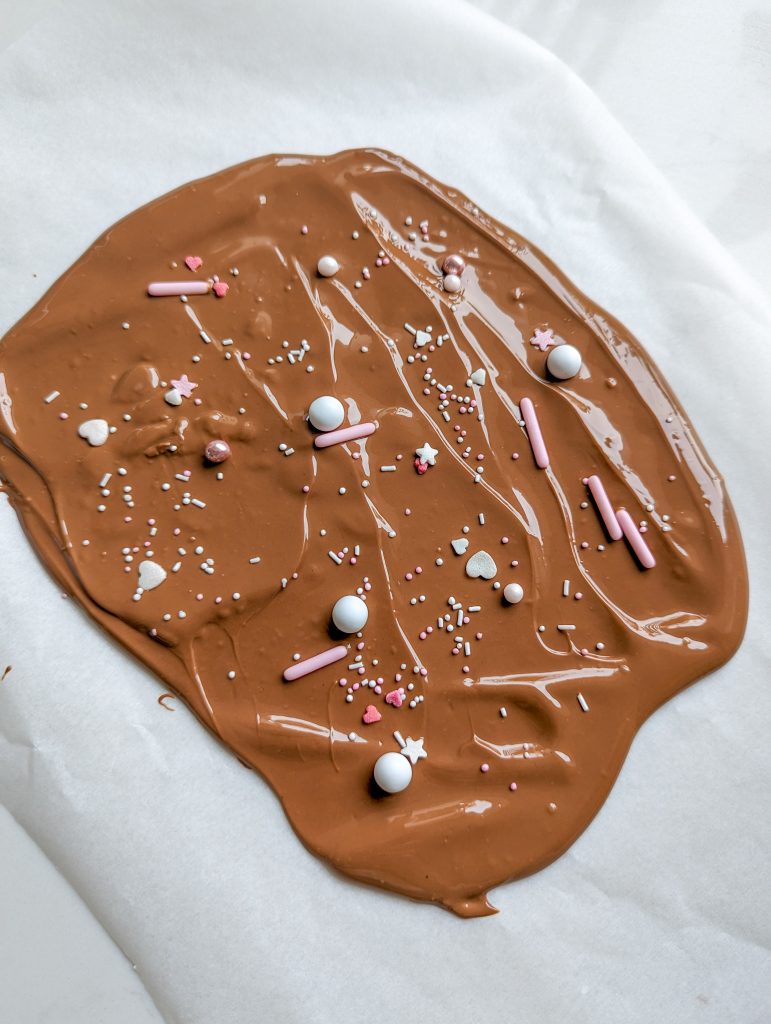
Chocolate bark is a great idea, the toppings are endless and the crack you will get from the chocolate being fully tempered is so satisfying.
Filled chocolates using special moulds- possibilities are endless.
Chocolate curls, shavings, and decorations can be made with tempered chocolate. This is a great way to give your desserts a professional, polished look.
Overall, there are many ideas for what to use tempered chocolate for. I enjoying making chocolate bark and cake decorations. It can also be used to make filled chocolates. With tempered chocolate, the possibilities are endless and it is a great way to make delicious, professional-looking treats.
I hope you enjoyed this and as always happy baking!


Excellent instructions only problem is I don’t have a microwave can I do this any other way-
I.e. jauntily over a pound of hot water.
Secondly can you recommend a course I could go on for using chocolate and chocolate making
Correction from Ms Edwards;
auto correct kicked in; last part should read Should read “no microwave can I melt chocolate over a pan of hot water”